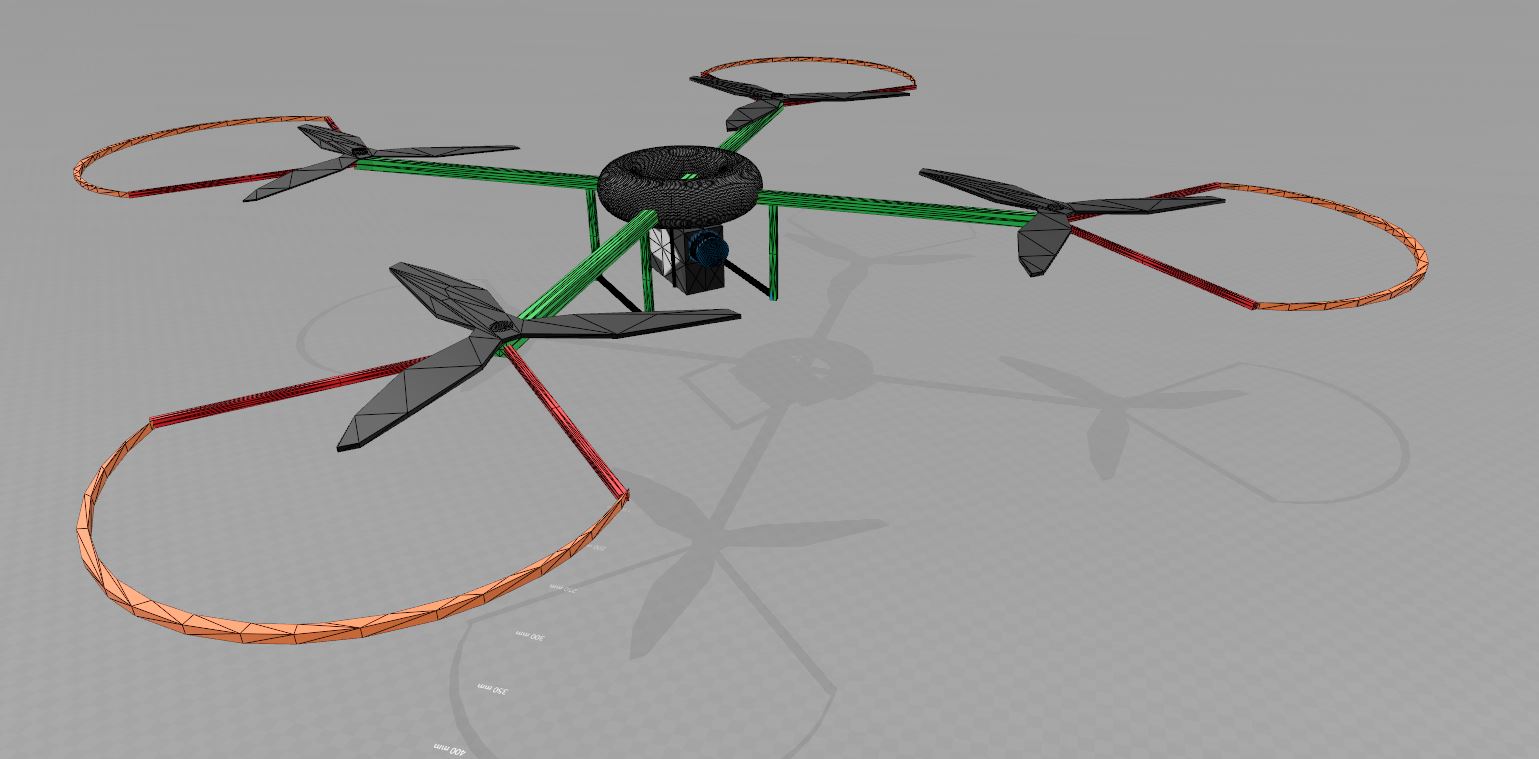
Working with 3D programs
This is a small show off how our drone looks like in windows 3D.
The batteries
In order to power our drone. We'll need batteries. Luckily we still have 2 Lipo batteries laying around in the workshop. Using these will safe us some money. We also know out of experience that they are trustworthy. Because the last thing we want is a drone that ends up in flames.
We will use 2 separate powersupplies. One that provides electicity for our thurst. And one to power our Raspberry PI 3. This means that we can easely change the batteries for our props without turning of the system.
The batteries that we'll use for our thrust are the turnigy 3s 20c 2200mah. We have two of these. The battery it self is very high kwality and is used in most main-stream AC planes.

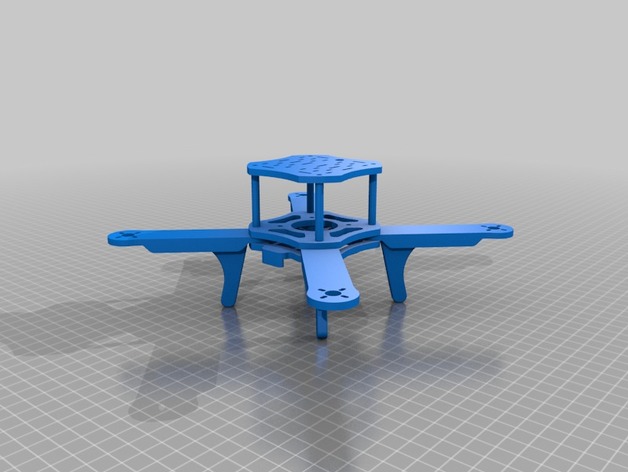
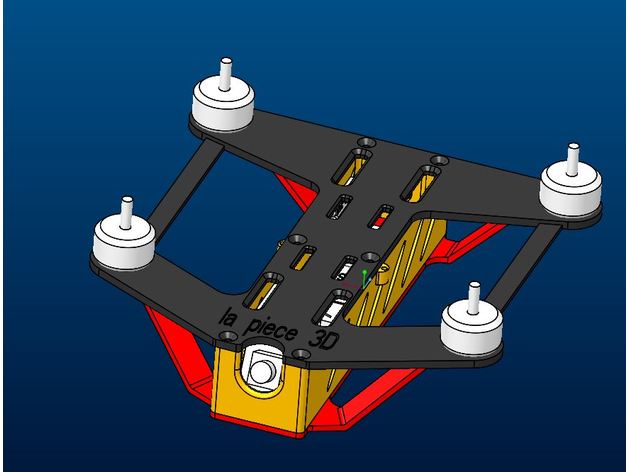
3D design
To get a better idea of how the drone will look like we used a website named www.thingiverse.com on this website you can see multiple prefabs. Under every 3Dprefab there is a downloadlink. These files are compatible with most 3D printers. This means that we can easely print it. Thanks to these websites we can work more efficient.
This is one of those 3Dprefabs that we will most likely be using for our drone.
LINK: Shuriken
Raspberry PI 3
Getting the the drone to fly on a PI controlled software won't be easy. It is something new for both of us. Luckily we have people that can help us. Sure there is a long way to a fully operating PI-controlled drone. We might even download software from the internet to install on our drone. Just to get to know the PI's "behavior". Software is free to download on raspberrypi.org
What is a Raspberry PI? The PI is a very small computer. Just like every other computer it contains a CPU, RAM, a power supply and storage possibilities.
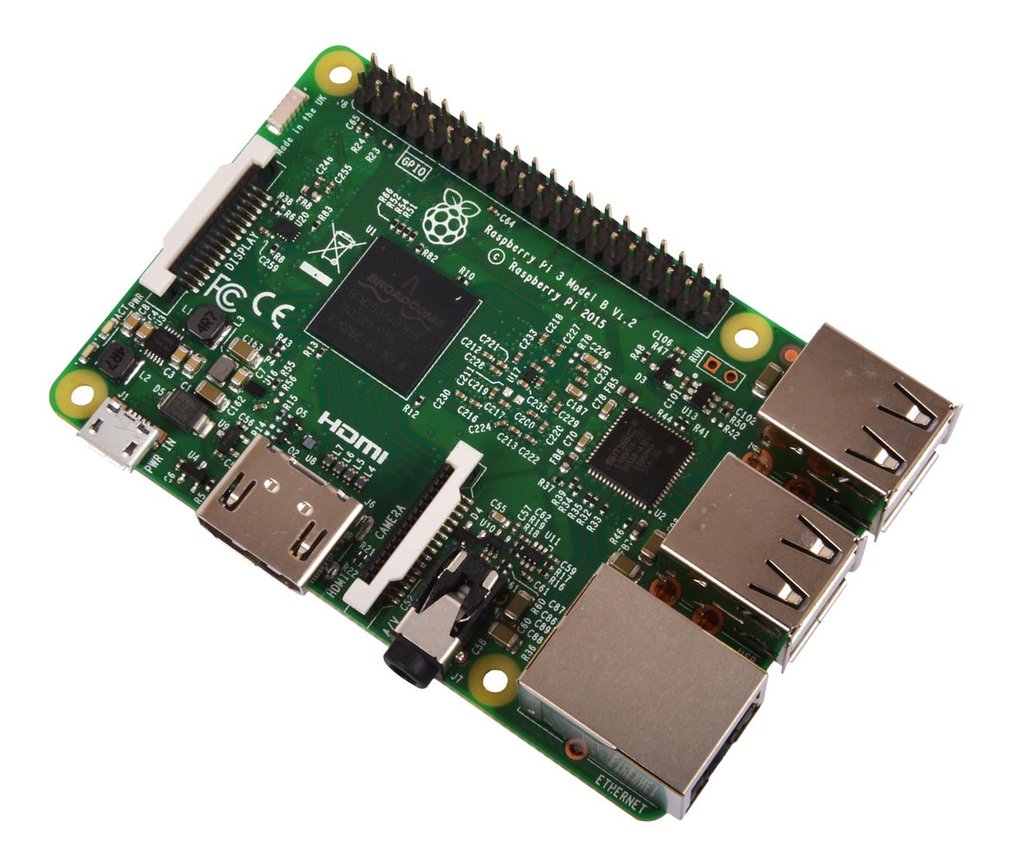
The Raspberrt PI 3 has a Cortex A53 1.2 GHz processor and 1GB of DDR2 RAM. Its powersupply is connected with a micro-USB port. So it can be connected to a batterypack. It weighs 45gram. And has a built-in Wifi and Bluetooth 4.2 connection. The Raspberry PI3 model B costs around 40€. We will buy it from Megekko.nl
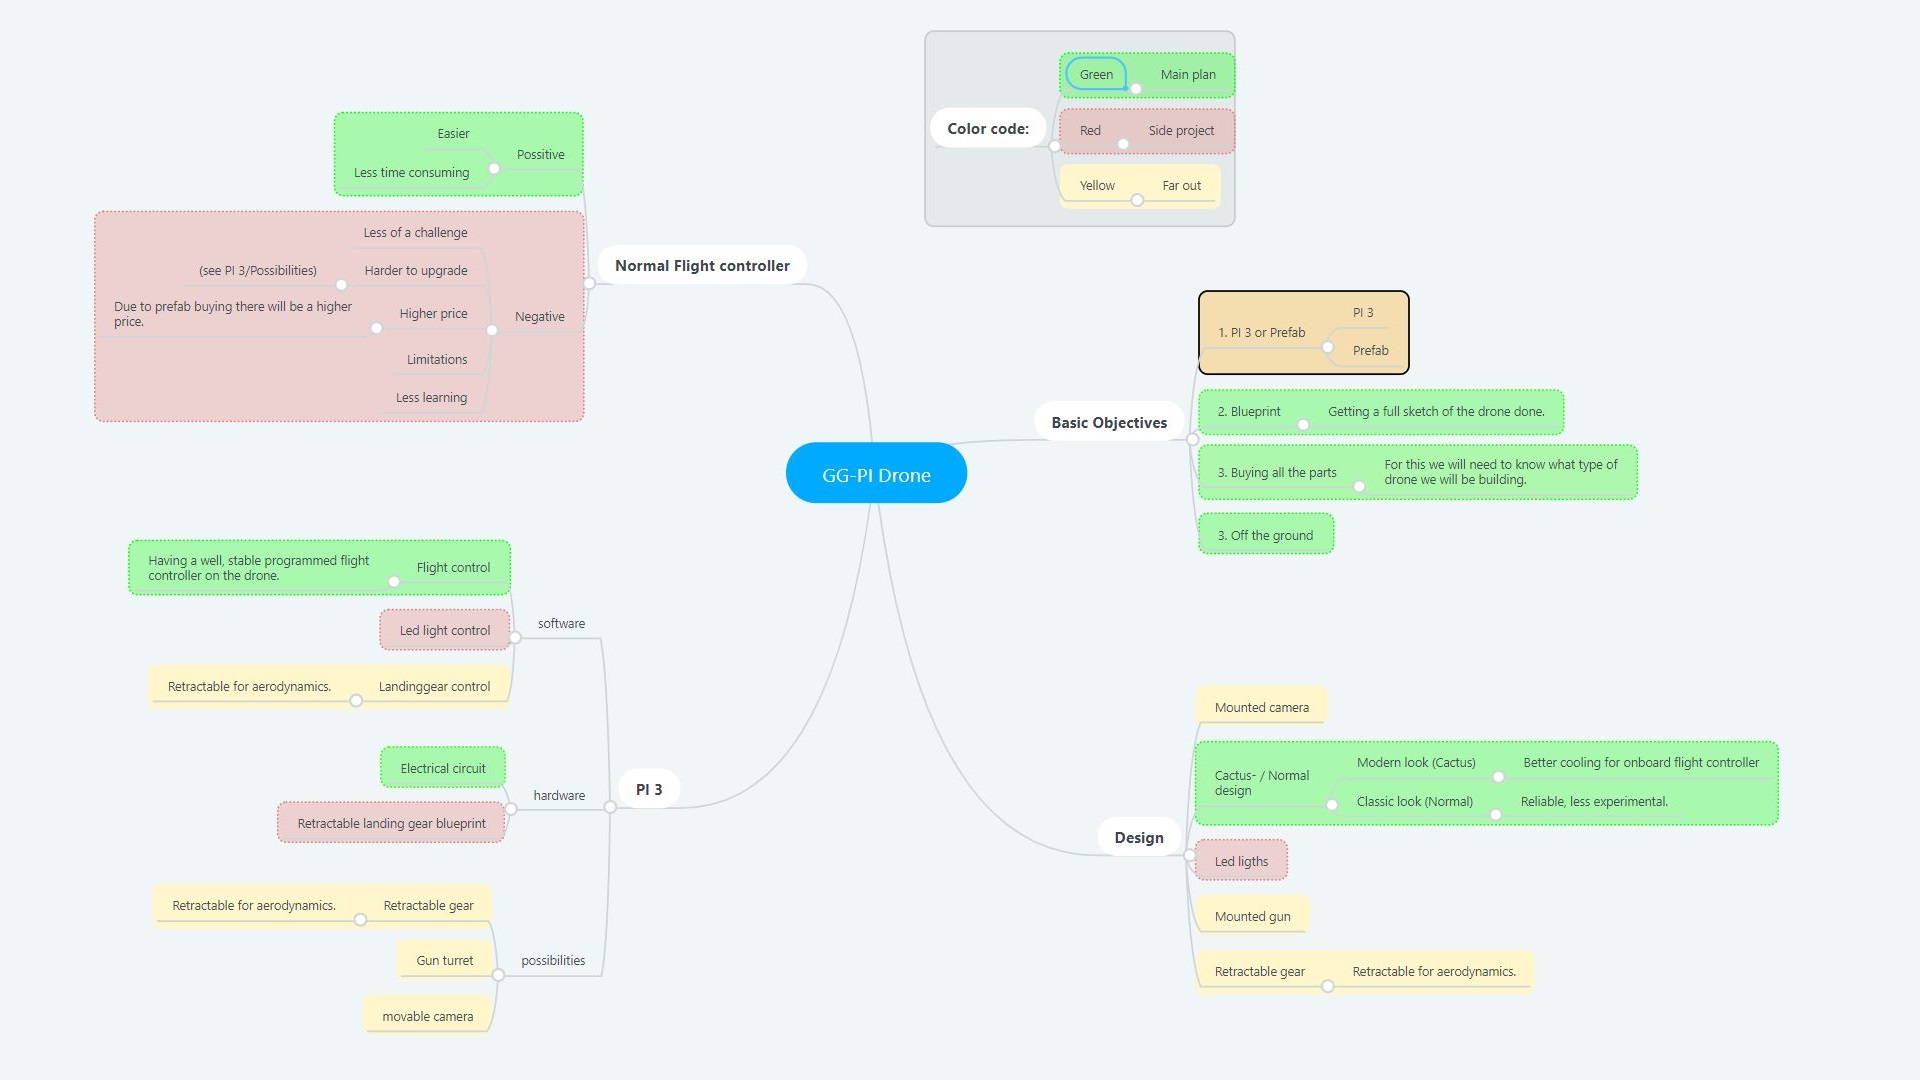
Mindmap
This mindmap shows all the futur objectives. Some are possible and some aren't. Having fantasy is important. But to be able to really built something is so much better. That is why we made this mindmap. It is an easy road to follow and it gives us a good foundation to start on. A clear path is something that is of major import when you're creating a project off this size.
You can click on the picture down below. But if you want to explore our mindmap even better then just looking at a picture just go to: GG-PI Mindmap "No login required".
Or if you want to create your own mindmap. Go to: Mindmeister.com.
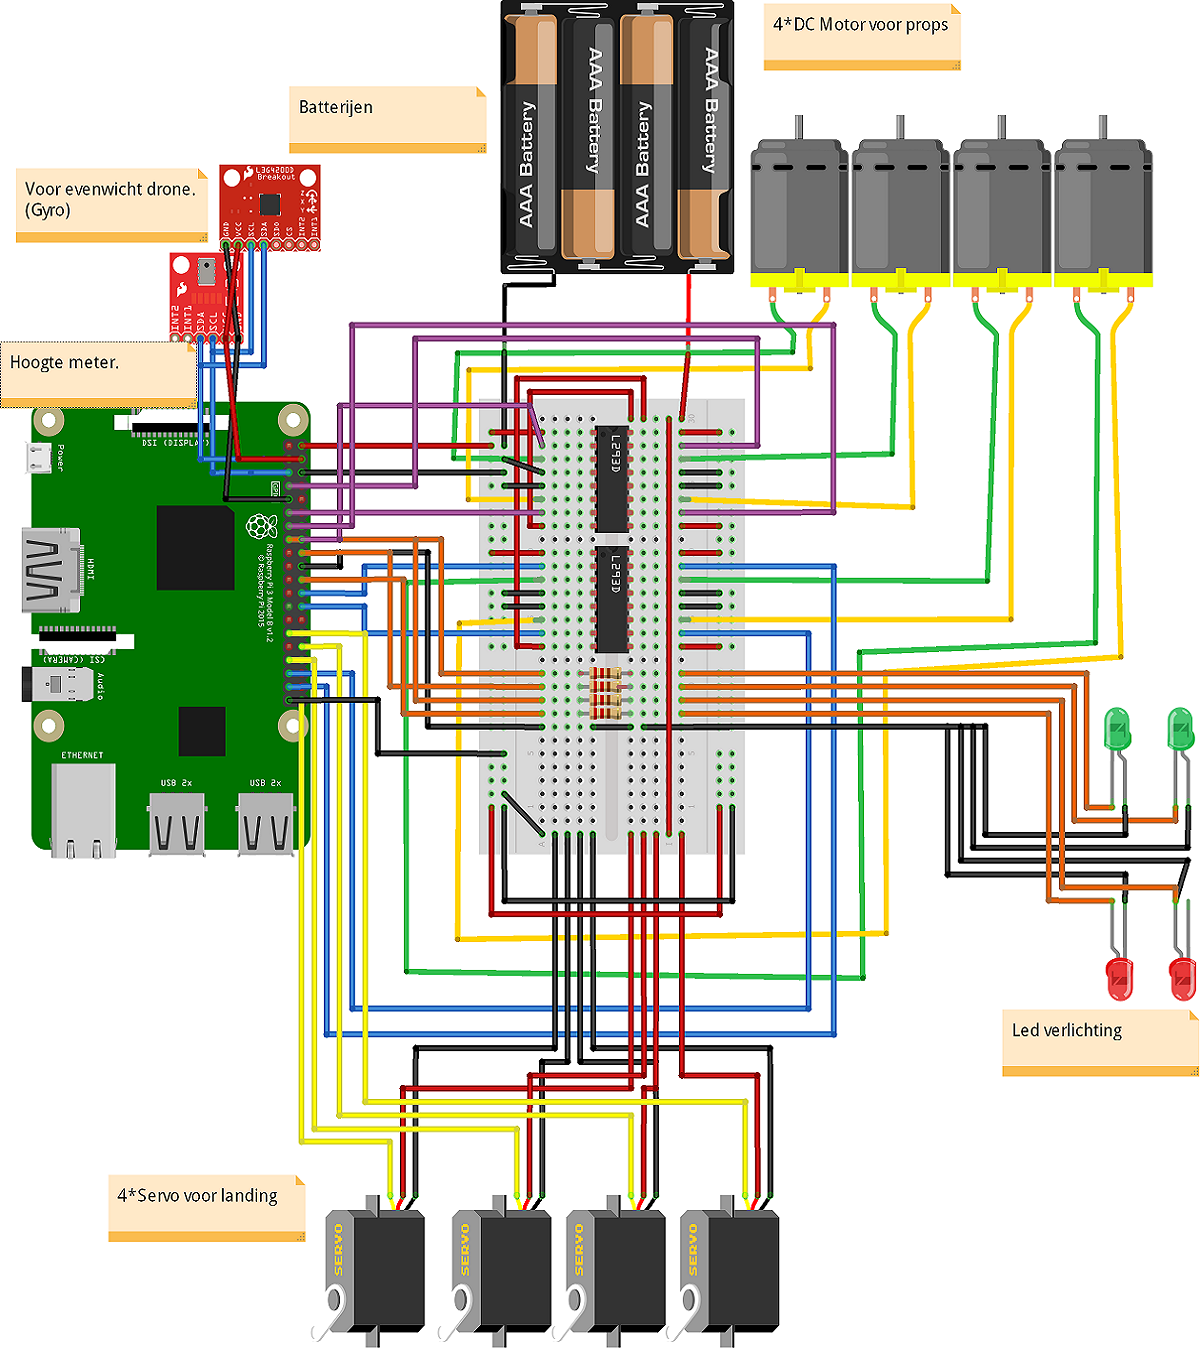
The electrical circuit
This is our electric circuit. We used a program named Fritzing to really show the tech side of our drone. In this sketch everything that is on the tech side is included. Thist makes it easyier to work with as a blueprint for the electrical design of the drone.
Design
There are a couple of things that we want to built. Thse are sort of upgrades of the drone. Building these things wont be easy. We will need the drone design to be able to upgrade it.
The looks
A blueprint of the drone.

The features
Here are our features.
- A camera mount
- Retractable landing gear
- Led lights (red at the left, green on the right Back under P.O.V)
- Cactus skeleton frame (is it printable ?)
- Selfmade flight controller (to difficult ?)
- Gyroscope to balance the drone
- Some batteries
Our project Info
In this project we will creating a quadcopter. As motherboard we will use a Raspberry PI. This motherboard will be able to control the landing gear, the led lights, the flight pilot and much more. We had this idee because we both love flying and because we couldn't wait to create something on our own. We got the assignment to do whatever we wanted and the first thing we thought of was this. It wasn't an easy idee because we knew what we were getting our selfs in to. Our motivation was just unstoppable. Then a couple of days later we thought that building a drone was something. Yes. Upgrading it would give us the opportunity to work on this project for the entire year. So we started to speculate about a couple nice idees. Some exeples of these are: a cactus skeleton frame, it gives us the best cooling for all the components and looks very nice. We also thought about a retractable landing gear so it'll be more aerodynamic.